Create folder named whatever you want, I am called SDTuts_WordPress and create subdirectories as in following snapshot.

create subdirectories of WordPress html theme
Write basic html in index.html file
Write the basic html tags as defined in following code and link stylesheet bootstrap.min.css and theme.css file which we will create.
[html]
<html>
<head>
<title>SDTuts – WordPress Tutorial</title>
<link rel="stylesheet" type="text/css" href="css/bootstrap.min.css" />
<link rel="stylesheet" type="text/css" href="css/theme.css" />
</head>
<body>
<div class="main_container col-lg-12 nlrp">
<div class="header col-lg-12 nlrp">
<h1>SDTuts Blog</h1>
<h3>Web Design and Development Tutorial</h3>
</div>
</div>
</body>
</html>
[/html]

Write basic html in index.html file-preview
Create css files and write basic styles in theme.css file
Go to css folder and create download “bootstrap.min.css” and put file in css directory, Create theme.css file and write the following css properities in theme.css file. here we also defining and importing fonts we I have download from google fonts also imported fonts available in source file which is attached.
[css]
@font-face{
font-family:’opensans’;
src:url(‘../fonts/OpenSans-Regular.eot’);
src:url(‘../fonts/OpenSans-Regular.eot?#iefix’) format(’embedded-opentype’),
url(‘../fonts/OpenSans-Regular.woff’) format(‘woff’),
url(‘../fonts/OpenSans-Regular.ttf’) format(‘truetype’),
url(‘../fonts/OpenSans-Regular.svg#opensans’) format(‘svg’); font-weight:normal; font-style:normal;
}
@font-face{
font-family:’opensansb’;
src:url(‘../fonts/OpenSans-Bold.eot’);
src:url(‘../fonts/OpenSans-Bold.eot?#iefix’) format(’embedded-opentype’),
url(‘../fonts/OpenSans-Bold.woff’) format(‘woff’),
url(‘../fonts/OpenSans-Bold.ttf’) format(‘truetype’),
url(‘../fonts/OpenSans-Bold.svg#opensans’) format(‘svg’); font-weight:normal; font-style:normal;
}
body{ font-family:opensans;}
a{ opacity:0.9; /*quick effect*/ }
a:hover{opacity:1;}
.nlrp{padding-left:0; padding-right:0;}
.nlp{padding-left:0;}
.nlr{padding-right:0;}
[/css]
Set css of Main Title, tagline and add header background image in header
Write the following css in theme.css file, set font style of Main Title, tagline, and add background image in header section.
[css]
.header{
background-image: url(‘../images/header cover.jpg’);
height: 400px;
}
.header h1{
margin-top: 80px;
text-align: center;
font-family: opensansb;
font-size: 80px;
}
.header h3{
text-align: center;
font-family: opensansb;
font-size: 20px;
color: #ffc107;
}
[/css]

header preview after applying css
Adding html of Menu
Add following html of main menu after h3 tag of tag line
[html]
<ul class="main_menu_ul">
<li class="active"><a href="#">Tutorials</a></li>
<li><a href="#">Become Author</a></li>
<li><a href="#">About</a></li>
<li><a href="#">Contact US</a></li>
</ul>
[/html]
Add css styles to main menu
[css]
.main_menu_ul{
position: relative;
display: block;
margin: 0 auto;
width: 80%;
background: #000;
border-radius: 100px;
height: 65px;
}
.main_menu_ul li{
list-style:none;
float: left;
}
.main_menu_ul li a{
color: #fff;
padding: 20px 60px;
margin: 0 5px;
float: left;
font-size: 18px;
}
.main_menu_ul li.active a, .main_menu_ul li a:hover {
color:#ffc107;
text-deoration:none;
}
[/css]

main menu preview
Add html of recent post section
Adding html of recent posts section with post box, post title, post thumbnail, post description and tag “READ MORE”, html should be after header’s div. I am using title, thumb from website.
[html]
<div class="main_post_section">
<div class="post_section">
<h2 class="heading">Recent Posts</h2>
<div class="postbox">
<a href="#" class="postthumb"><img src="images/Laravel-custom-columns-login-authentication.png" /></a>
<a href="#" class="posthreftitle">Laravel custom columns login authentication</a>Laravel provide a great solution for login authentication, in sometimes we have typically a database table with custom table name
<a href="#" class="postreadmore">READ MORE</a>
</div>
<div class="postbox">
<a href="#" class="postthumb">
<img src="images/css scroll table body – table freeze panes.png" />
</a>
<a href="#" class="posthreftitle">css scroll table body – table freeze panes</a>
By default header of table are moving on top position of table when we scrolling down
<a href="#" class="postreadmore">READ MORE</a>
</div>
<div class="postbox">
<a href="#" class="postthumb">
<img src="images/how to get category from url in wordpress.png" />
</a>
<a href="#" class="posthreftitle">how to get category from url in wordpress</a>
Lorem Ipsum is simply dummy text of the printing and typesetting industry.
<a href="#" class="postreadmore">READ MORE</a>
</div>
<div class="postbox">
<a href="#" class="postthumb">
<img src="images/Print-numbers-in-diamond-shape-PHP.png" />
</a>
<a href="#" class="posthreftitle">PHP print triangle diamond</a>
This is easy and too much loop less code to write diamond and triangle shapes.
<a href="#" class="postreadmore">READ MORE</a>
</div>
<div class="postbox">
<a href="#" class="postthumb">
<img src="images/PHP-server-side-form-validation.png" />
</a>
<a href="#" class="posthreftitle">PHP Server Side Form Validation tutorial</a>
PHP Server Side Form Validation is highly recommended and unbreakable from browser like front-side JavaScript .
<a href="#" class="postreadmore">READ MORE</a>
</div>
</div>
</div>
[/html]
Adding css styles of recent posts section
[css]
.post_section{
position: relative;
margin: 0 auto;
width: 90%;
}
.post_section h2.heading{
color: #616161;
font-size: 20px;
font-weight: bold;
border-bottom: #dedede 1px solid;
padding-bottom: 5px;
}
.postbox {
width: 260px;
float: left;
margin: 0 40px 70px 0;
height: 430px;
}
.postthumb{
width: 270px;
border-radius: 15px;
overflow: hidden;
float: left;
height: 250px;
}
.posthreftitle{
font-family: opensansb;
color: #101010;
margin: 10px 0;
font-size: 15px;
float: left;
width: 100%;
}
.post_para{
color: #b7b7b7;
float: left;
}
.postreadmore{
color: #ffc107;
background: #000;
padding: 15px 27px;
border-radius: 10px;
font-family: opensansb;
margin-top: 10px;
float: left;
}
.postreadmore:hover{
color:#ffc107;
text-deoration:none;
}
[/css]
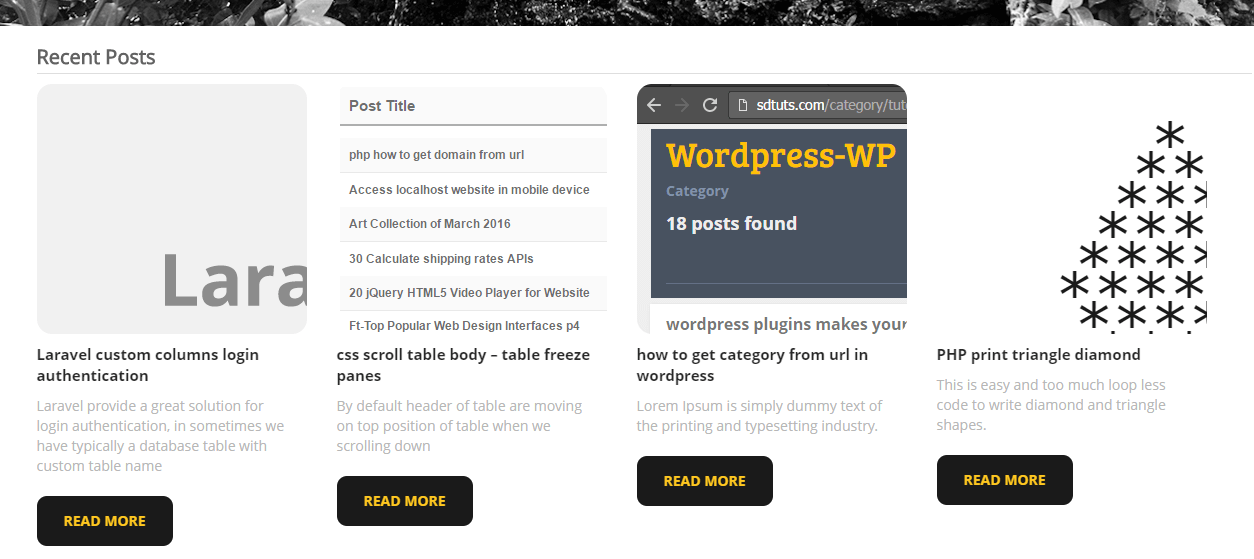
Add html of recent post section-preview
Add html of comment form, and user’s comment section
Adding html of comment after postbox tag, and user’s comment section after div tag of recent posts. its wrong to place the comment form and comments in main page of site, just follow the step and we will use it in single page of post,
[html]
<div class="comment_section col-xs-12 nlrp">
<h3>Comments</h3>
Write comments about post
<form class="comments_form">
<div class="col-xs-12 nlrp comment_input_fields">
<input type="text" placeholder="Enter your name" class="col-md-3" name="name" />
<input type="email" placeholder="Enter your email" class="col-md-3" name="email" />
<input type="text" placeholder="Enter your website" class="col-md-3" name="url" />
</div>
<textarea placeholder="Enter your comment" name="comment"></textarea>
<button class="comment_submitbtn" type="submit">Submit Comment</button>
</form>
<h2 class="comment_heading">1 Comment on post</h2>
<div class="single_comment">
<div class="comment_photo col-xs-12 nlp">
<img src="images/3713f144c5df3e9e0e6c31c4a04a4fec.jpeg" />
</div>
<div class="comment_data_area col-xs-10 nlp">
<h3>Rameez Soomro</h3>
This is WordPress Tutorial, based on single page with blog template also tutorial available with video.
</div>
</div>
</div>
[/html]
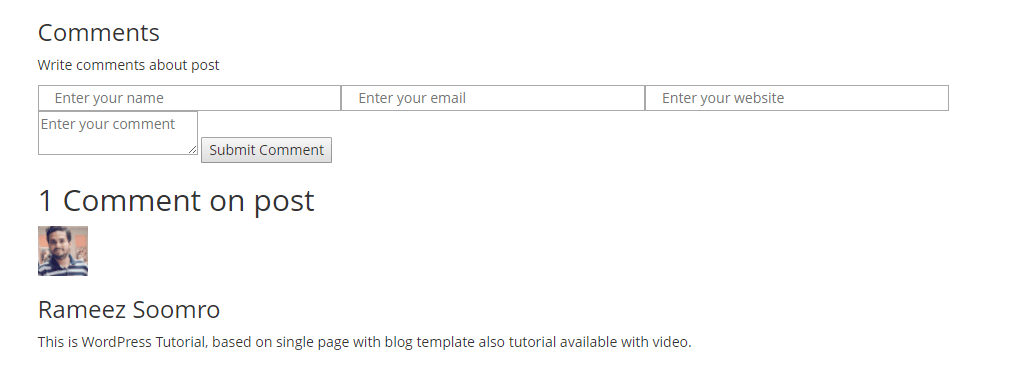
html preview of comment section without css
Add css styles of comment form and user’s comments
[css]
.comment_section{
border-top: #dedede 2px solid;
margin-bottom: 10px;
}
.comment_section .comment_heading{
padding: 0 0 10px 0;
margin: 0 0 20px 0;
font-size: 24px;
border-bottom: #f2f2f2 2px solid;
font-family: opensansb;
color: #ffc107;
}
.comment_section .comment_input_fields{
margin-bottom:10px;
}
.comment_section .comment_input_fields input{
margin-right:5px;
}
.comment_section .comment_input_fields input, .comment_section textarea{
background: #f2f2f2;
border: none;
padding:10px;
color: #b1b1b1;
}
.comment_section .comment_input_fields input:focus, .comment_section .textarea:focus{
outline:none;
color:#777777;
}
.comment_section textarea{
resize:none;
height:150px;
width:100%;
}
.comment_section .comments_form .comment_submitbtn{
background-color: #f2f2f2;
outline: none;
margin-top: 10px;
border: none;
padding: 10px;
font-family: opensansb;
color: #929292;
}
.comment_section .comments_form .comment_submitbtn:hover, .comment_section .comments_form .comment_submitbtn:focus{
color: #5f5ff;
}
.single_comment h3{
padding: 0;
margin: 0;
font-size: 18px;
padding-bottom: 5px;
color: #717171;
font-family: opensansb;
border-bottom: #f2f2f2 1px solid;
}
.single_comment .comment_photo{
overflow: hidden;
width: 100px;
margin-right: 10px;
height: 100px;
border-radius: 100px;
}
.single_comment .comment_photo img{
max-width:100px;
}
.single_comment p{
margin-top: 10px;
color: #7b7b7b;
}
[/css]
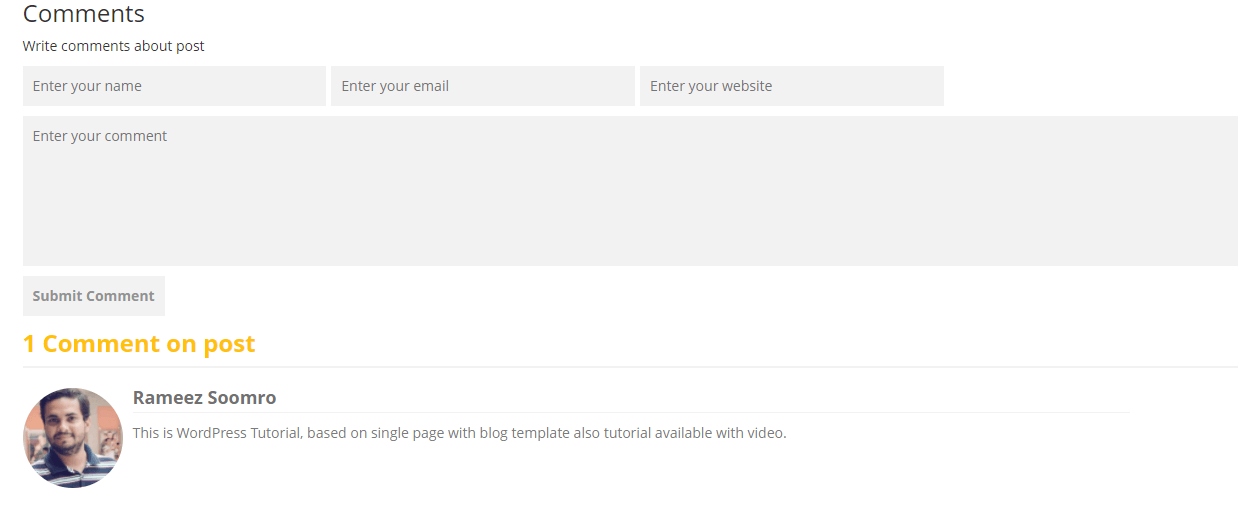
html preview of comment section after adding css
Let’s start the footer section
Let’s complete the final footer section, footer section contains ART Posts, Helpful Links and Social Links which are different styles. so here put the footer’s html after main_container div.
[html]
<div class="footer col-lg-12 nlrp">
<div class="col-xs-4 art_posts">
<h3>ART Posts</h3>
<div class="post">
<img src="images/Art-Collection-of-July-2017-150×150.png">
<strong>Art Collection of July 2017</strong>
<span>Art of 1st JulyBirbs by TsaoShin Art of</span>
2 comments – <a href="#">READ MORE</a>
</div>
<div class="post">
<img src="images/Art-Collection-of-June-2017-150×150.png">
<strong>Art Collection of June 2017</strong>
<span>Art of 1st JuneVision Of Terror by JJcanvas</span>
2 comments – <a href="#">READ MORE</a>
</div>
</div>
<div class="footer_links col-lg-2">
<h3>Helpful Links</h3>
<ul class="helpful_links_ul">
<li><a href="#">About</a></li>
<li><a href="#">RSS Feed</a></li>
<li><a href="#">XML Feed</a></li>
<li><a href="#">Contact US</a></li>
</ul>
</div>
<div class="footer_links col-lg-2">
<h3>Social Links</h3>
<ul class="helpful_links_ul">
<li><a href="#">Facebook</a></li>
<li><a href="#">Google Plus</a></li>
<li><a href="#">Twitter</a></li>
<li><a href="#">Youtube</a></li>
</ul>
</div>
<div class="footer_copyright">
SDTuts.com – WordPress Tutorial 2017
</div>
</div>
[/html]

preview of footer section before applying css
Add css styles to footer section
[css]
.footer{
background: #0d0d0d;
padding-bottom: 20px;
margin-top: 20px;
}
.footer h3{
color: #6c6c6c;
font-size: 22px;
font-family: opensansb;
margin: 10px 0;
}
.footer .art_posts{
}
.footer .art_posts .post{
float: left;
margin: 5px 0;
border-bottom: #444 1px solid;
padding-bottom: 10px;
}
.footer .art_posts .post img{
float: left;
width: 75px;
height: 75px;
border-radius: 10px;
}
.footer .art_posts .post strong{
float: left;
margin-left: 10px;
font-family: opensansb;
color: #c1c1c1;
clear: right;
font-size: 16px;
}
.footer .art_posts .post span{
float: left;
margin-left: 10px;
clear: right;
color: #8a8a8a;
}
.footer .art_posts .post p{
float: left;
margin: 10 0 0 10px;
color: #fff;
}
.footer .art_posts .post p a{
color: #ffc107;
font-family: opensansb;
text-decoration: underline;
}
.footer .footer_links .helpful_links_ul{
float: left;
margin: 0;
padding: 0;
}
.footer .footer_links .helpful_links_ul li{
list-style: none;
float: left;
width: 70%;
}
.footer .footer_links .helpful_links_ul li a{
margin: 0 0 10px 0;
border-bottom: #ffc107 1px dashed;
float: left;
color: #fff;
width: 100%;
}
.footer .footer_links .helpful_links_ul li a:hover{
text-decoration:none;
}
.footer .footer_copyright{
float: left;
width: 100%;
background: #151515;
padding: 10px 0;
}
.footer .footer_copyright p{
color: #b9b9b9;
font-family: opensansb;
margin: 0 0 0 10px;
}
[/css]

preview of footer section after applying css

